

Shalom Dhwani is a Christian newspaper. This guide is a complete, step-by-step walkthrough of the Shalom Dhwani article editor. Use it to write and submit a news post from start to finish. Everything happens on a single screen at shalomdhwani.com/editor.
Before you start
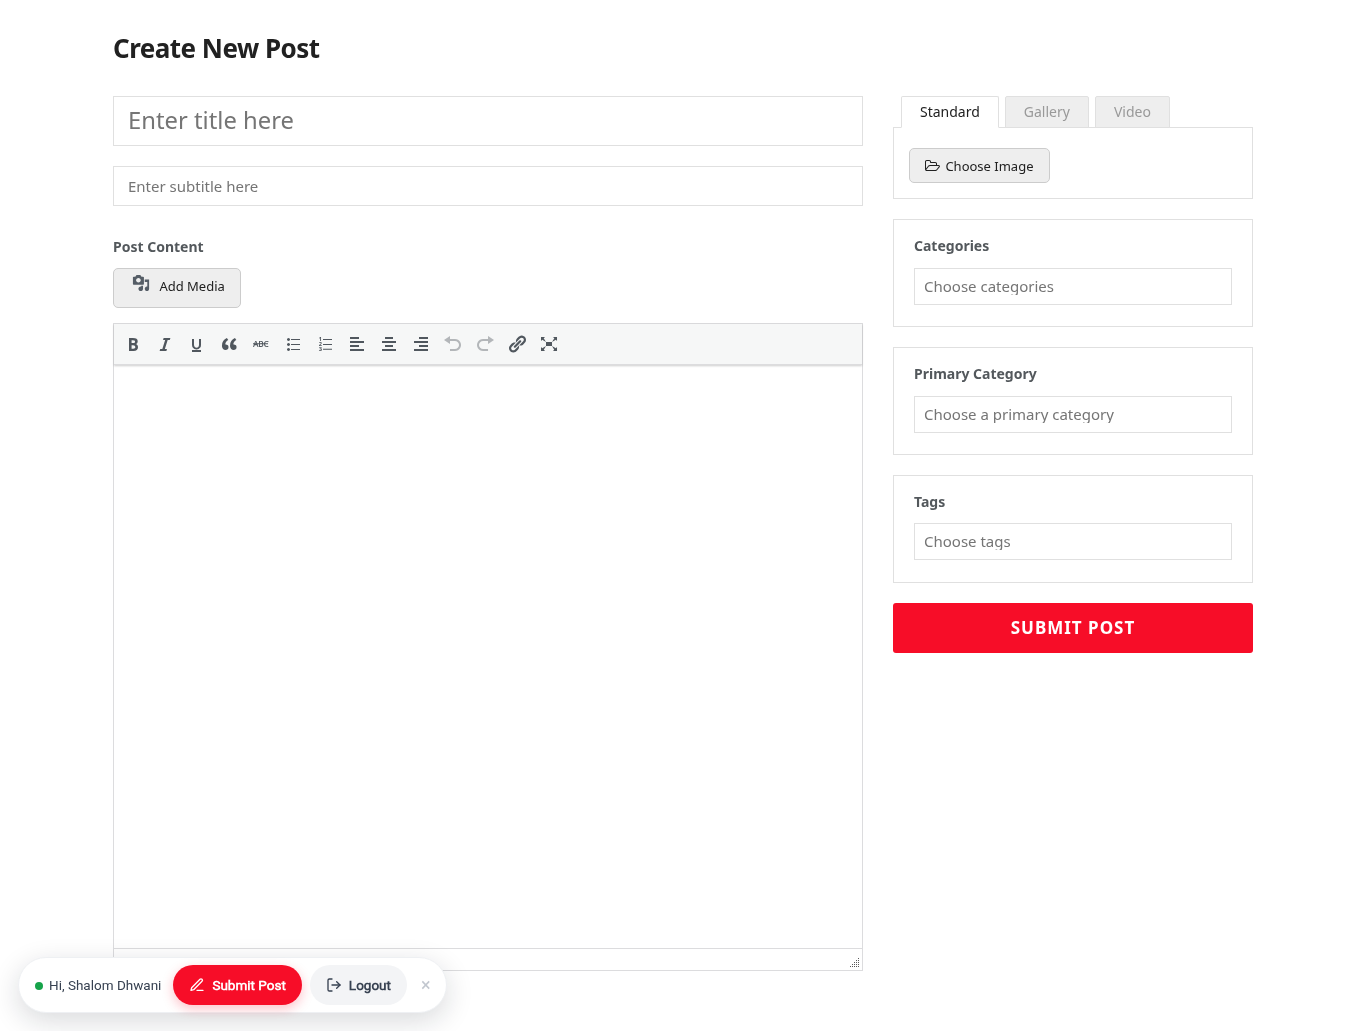
You must be logged in to use the editor. If you are not signed in, the form will not appear — first log in at shalomdhwani.com/login, then open /editor. Once signed in, you will see the “Create New Post” screen shown below.
Step 1 — Add a title and subtitle
- In the “Enter title here” box, type the headline of your article. Keep it clear and specific.
- In the “Enter subtitle here” box, add a short supporting line (optional, but recommended).
Step 2 — Set the Permalink (URL) *
The Permalink (URL) is your article’s web address — the part after shalomdhwani.com/. This field is required.
- In the Permalink (URL) box, type a short, descriptive ending for the link — e.g. news, kerala-news or obituary.
- As you type, a preview shows the full address (e.g. shalomdhwani.com/kerala-news) and whether it is available.
- If that address is already in use, it automatically takes the next free number — e.g. kerala-news1, kerala-news2 — so your link is always unique.
Tip: keep it short and lowercase, with hyphens between words. Malayalam is fine too.
Step 3 — Write your content
- Type or paste your article into the Post Content editor.
- Use the toolbar to format text — bold, italic, lists, alignment, quotes and links.
- To place an image inside the article body, click Add Media, then upload or pick an image and insert it.
Step 4 — Choose the post format and featured image
At the top of the right-hand column, pick the format that fits your story:
- Standard — a single featured image. Click Choose Image to upload the main photo for the article.
- Gallery — multiple images. Upload up to 8 photos for an image gallery.
- Video — paste a video URL or embed code to feature a video.
Tip: the featured image is what readers see on the homepage and in article listings, so choose a strong, clear photo (max 2 MB).
Step 5 — Set categories and tags
- Categories — click the “Choose categories” box and start typing the category name. Matching categories appear in a drop-down — click the one you want. You can add more than one. For example:
- Writing a news report? Type “news” and pick the right one — e.g. Kerala News, India News, World News, Karnataka News, Gulf News or US/Europe.
- Writing an article? Type “article” and select Articles (or Malayalam Article / English Articles).
- Writing a short story? Type “short” and select Short Story.
- Other types — Poems, Thoughts, Editorial, Obituary, Testimony and more: just start typing the name and select it.
- Tags — add a few keywords (people, places, topics) to help readers find the story.
Step 6 — Submit your post
When everything looks right, click the red Submit Post button. Your article is sent for review. Once an editor approves it, it is published to the site. If anything needs changing, an editor may send it back with notes.
Quick checklist
- Title (and subtitle) added
- Article written and proofread
- Featured image (or gallery / video) chosen
- Permalink (URL) set
- Category and tags set
- Submit Post clicked
Further reading: to learn how to write a good news report, see the News Writing Guide — Shalom Dhwani Style Guide.